
Pipeline View gives you a visual, organized way to move candidates through your hiring process -- think of it like a Kanban board for your applicant workflow. This article walks you through setting everything up just the way you like it.
Setting up your Stages and Statuses
The Pipeline setup page can be found in Account Details. Please use the Main Menu (☰) to select Account > Account Details > Pipeline.
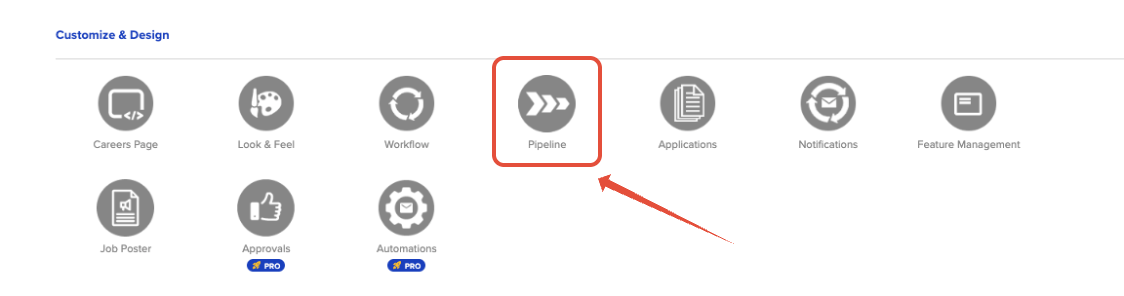
Some users may not have access to this page, so if you cannot see it, please contact your Administrator for assistance.
Map Your Statuses to Pipeline Stages
The system will default to the following stages: New, Reviewed, Hired, and Archived. Depending on your account setup, you may also see stages like Interview or others based on your active statuses.
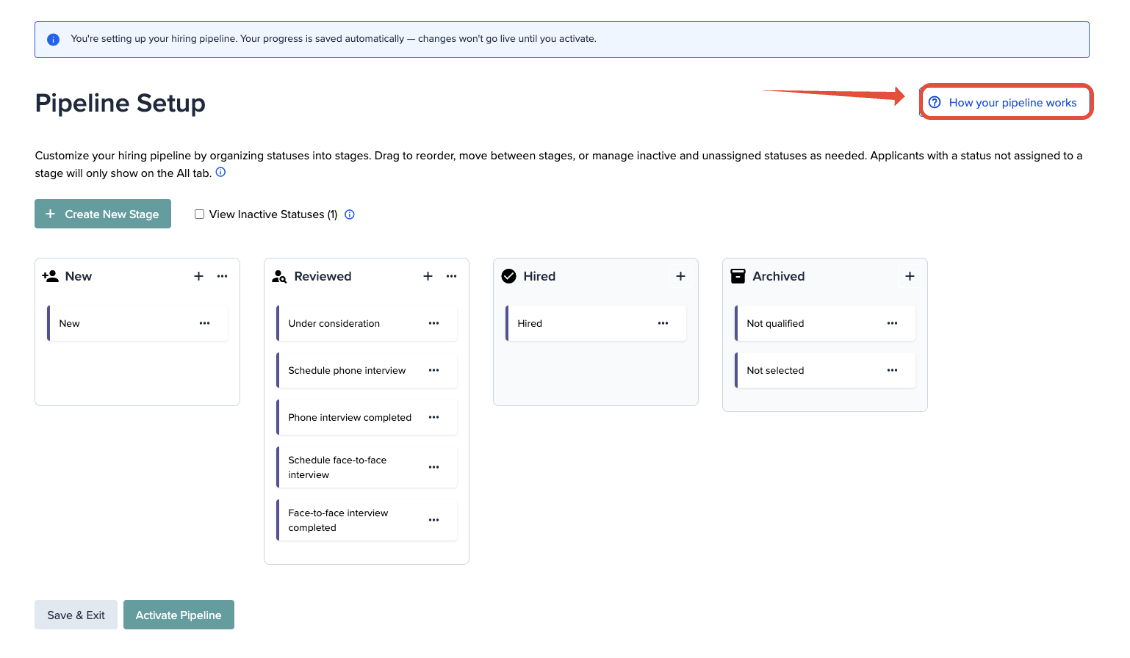
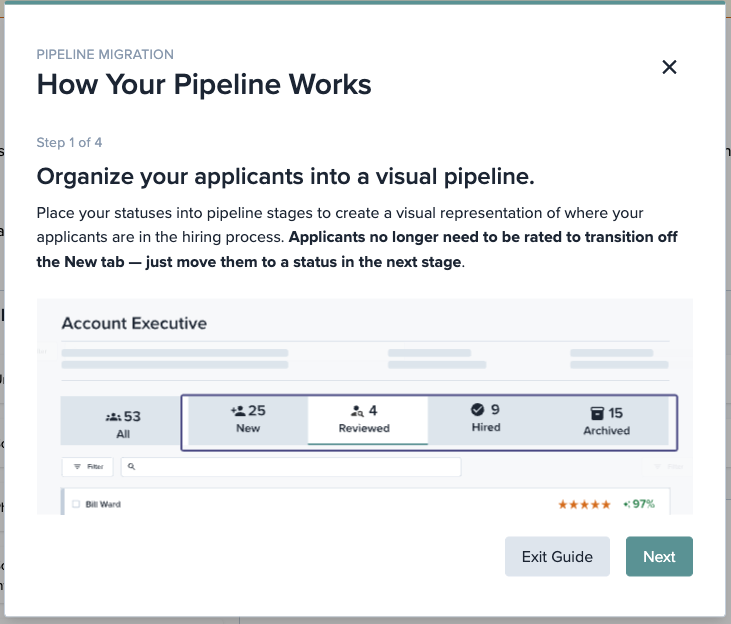
Take a moment to click on the "How your pipeline works" tooltip in the upper right of the page for a brief overview of the process and review the tutorial there.
When you're done reviewing the tutorial, click "Get Started" to fine-tune things before going live.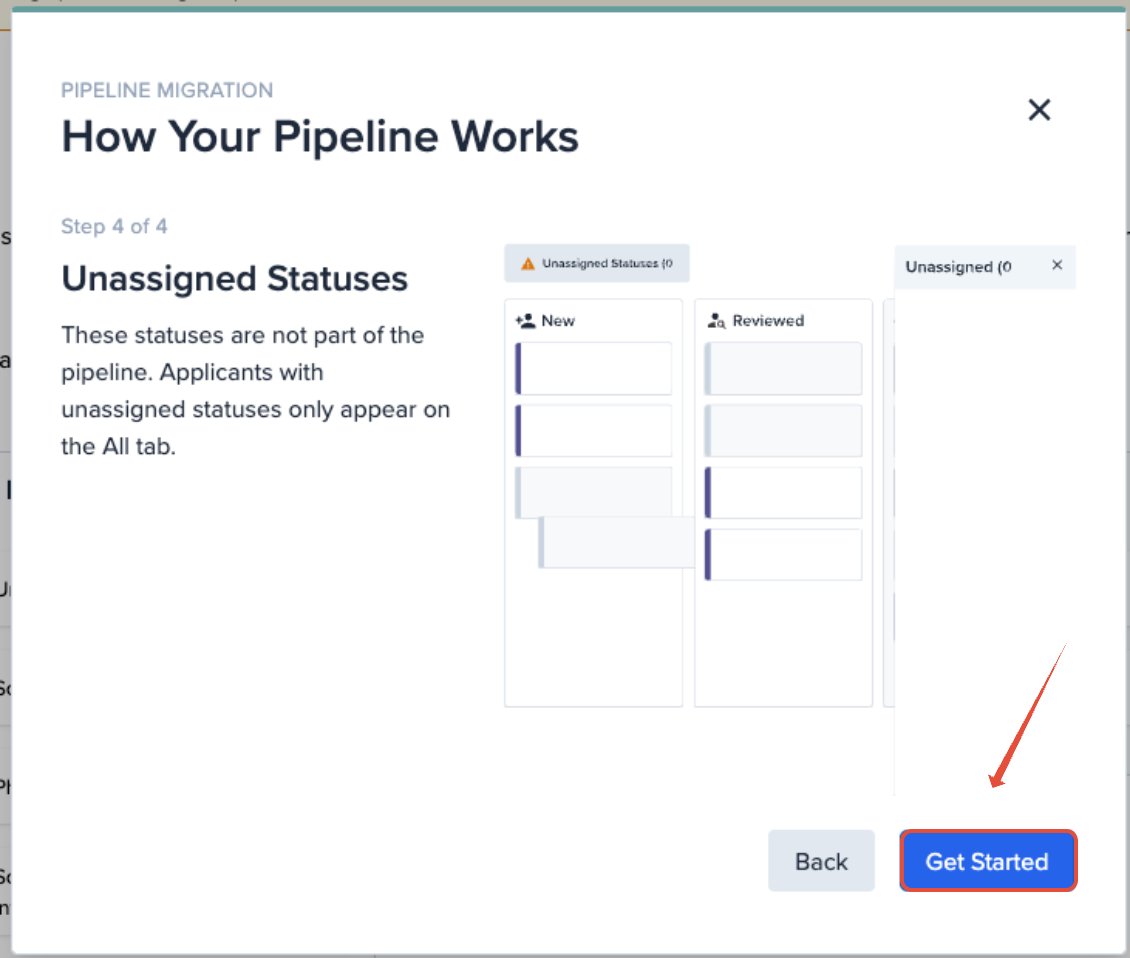
- Drag and drop any status to move it to the correct stage if the automatic sorting isn't quite right.
- Note: New applicants are automatically assigned to whichever status sits at the top of your New stage. Make sure that status is something that will prompt your team to take action -- like "Needs Review" or "New" -- so incoming applications don't get overlooked.
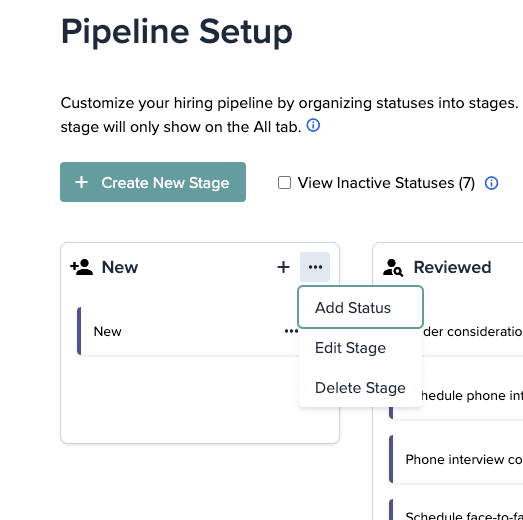
- Use the three-dot menu (...) on any stage to Edit, Delete, or Add a Stage.
- Note: Only those on a Pro Plan can add additional Stages. If your account is using our Essential Plan, you'll only be able to edit Statuses.
- Note: Only those on a Pro Plan can add additional Stages. If your account is using our Essential Plan, you'll only be able to edit Statuses.
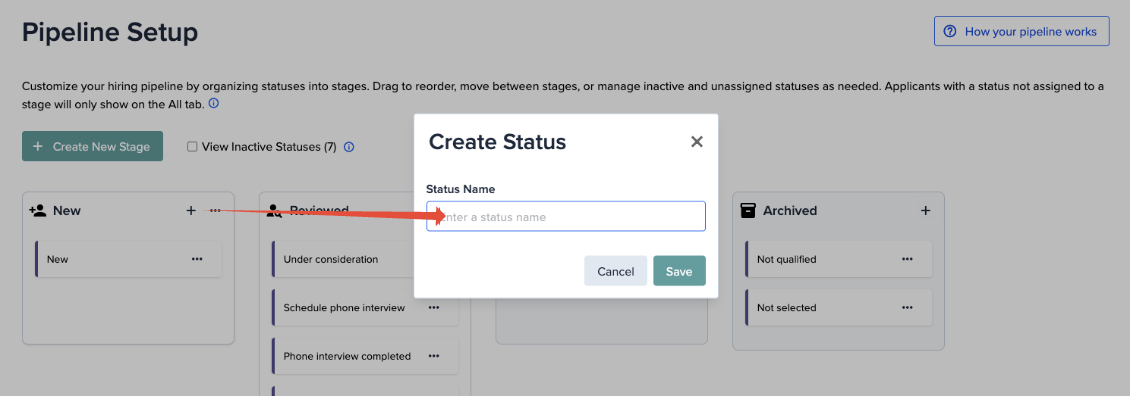
- Use the plus sign (+) on a stage to add a status to it. If you need a brand-new status that doesn't exist yet, you can create one here.
Check for Inactive Statuses
Not seeing a status you expected? It may be inactive.
- Check the box for View Inactive Statuses to make them visible.
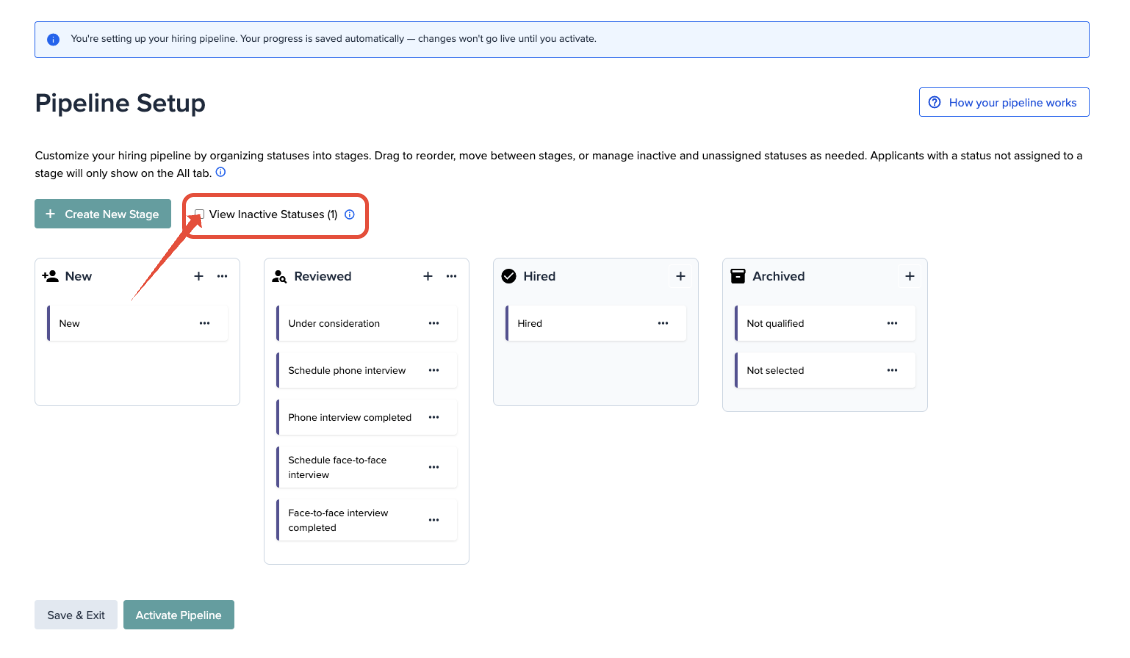
- Inactive statuses will appear under their suggested stage. You can activate any that you'd like to include in your pipeline.
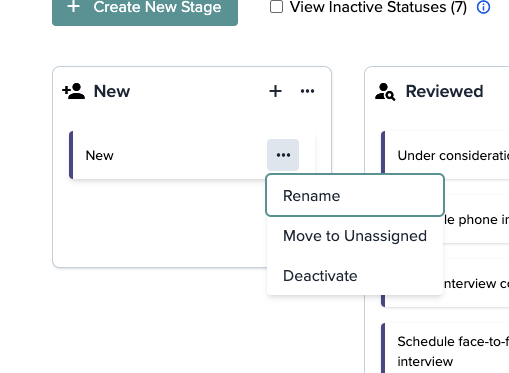
- Each status also has its own three-dot menu (...) that lets you Rename, Move to Unassigned, or Deactivate it.
Explore Your Pipeline View
Once the setup is complete, head back to the applicant grid to see your new view in action.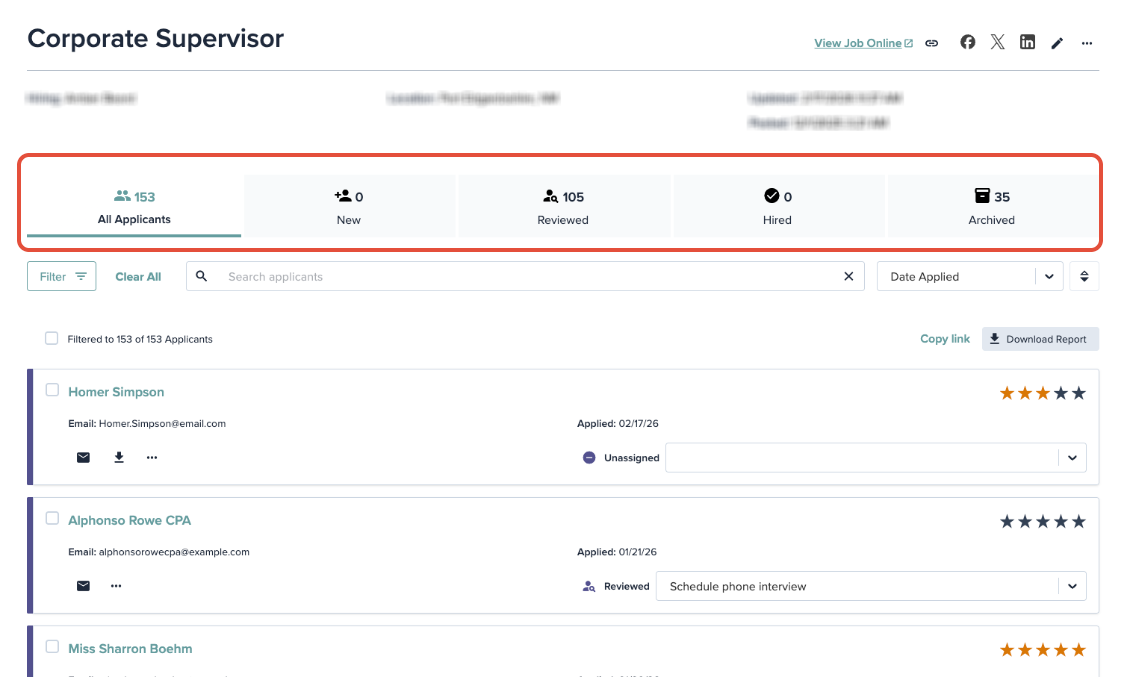
- Across the top, you'll see all of your stages along with a count of how many applicants are in each one.
- You can open applicant profiles and continue processing candidates just as you always have.
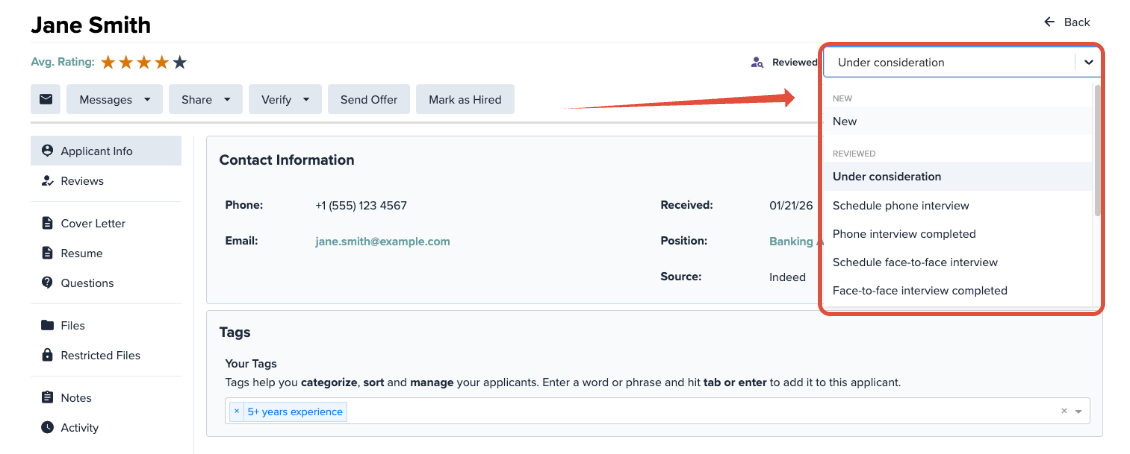
- The status selector (used to update an applicant's current status) is now located on the right side of the applicant profile, and statuses are organized by stage for easier navigation.
Making Changes
Need to rename a status, add a new one, or reorganize your pipeline after going live? No problem.
- Open the Main Menu (☰)
- Select Account Details.
- In the Customize and Design section, click the Pipeline icon.
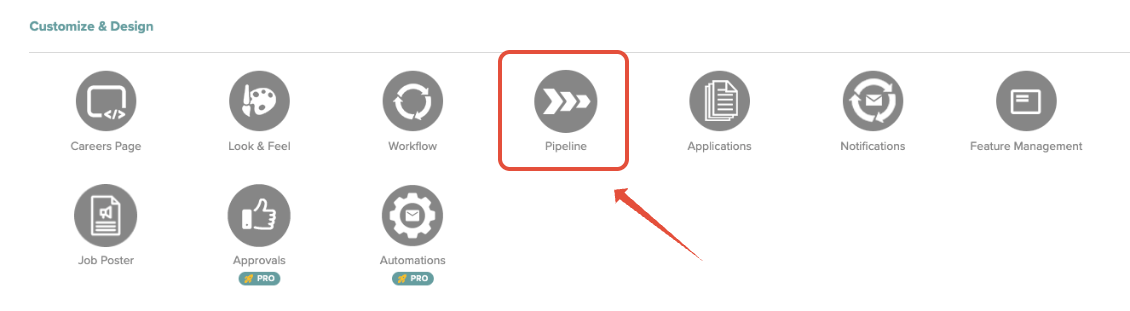
From there, you can make any adjustments to your pipeline setup at any time.
Note: Only those on a Pro Plan can add additional Stages. If your account is using our Essential Plan, you'll only be able to edit Statuses.
Questions or Running Into Issues?
Pipeline View is a big step forward, and the transition should be smooth -- but if you hit any bumps along the way, our support team is happy to help. Reach out to us anytime and we'll get you sorted out.
